how to glue a front lace wig like a pro easy step by step methods for secure all day hold
Mastering a Natural Look: How to Glue a Front Lace Wig for Long-Lasting Hold
If you've been searching for clear, actionable steps on how to glue a front lace wig and want a professional finish without damaged edges, this comprehensive guide walks you through every stage from preparation to removal. Whether you're a beginner or an experienced wig wearer refining your technique, you'll find practical tips, safety pointers, and troubleshooting strategies to keep your lacefront looking seamless and secure all day. The approaches below include adhesive-based methods, tape techniques, and alternative bonding options, each explained step-by-step with recommended products and common mistakes to avoid.
Why proper bonding matters
Securing a lace front correctly affects not only appearance but also comfort and hair health. A poorly applied lace can lift at the hairline, reveal glue residue, or irritate the skin. Conversely, knowing how to glue a front lace wig with the right prep and products gives you a natural, undetectable hairline and confidence that your style will stay in place during daily activities, workouts, and events.
Tools and supplies you’ll need
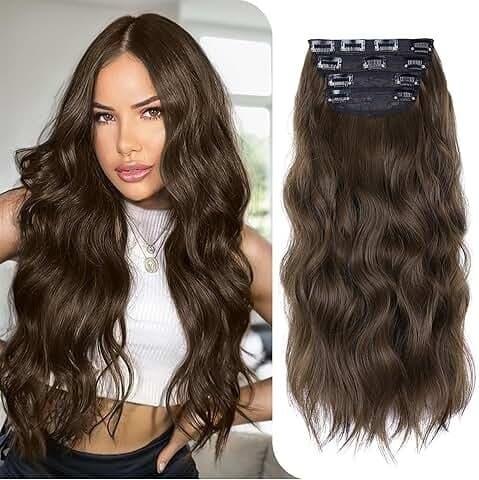
- Wig with pre-plucked or trimmed lace
- Skin-safe lace adhesive (e.g., medical-grade glue or bonding adhesive)
- Wig tape (optional for alternate method)
- Isopropyl alcohol (70% or higher) for cleansing
- Rubbing alcohol pads or alcohol-free cleanser for sensitive skin
- Scissors for trimming lace
- Rat-tail comb and edge brush
- Blow dryer (cool/low heat) or fan
- Scalp protector/sealant (optional for sensitive scalps)
- Makeup that matches your scalp (foundation, powder) for blending
- Setting spray or hair spray for extra hold
Prep: Skin and wig readiness
Proper preparation reduces lifting and irritation. Start by cleansing the hairline and surrounding skin to remove oils and residues. Use an alcohol wipe or isopropyl alcohol on a cotton pad and wipe the perimeter where the lace will sit. If your skin is sensitive, consider applying a thin layer of scalp protector per manufacturer instructions. Trim the lace carefully, leaving about 1/8 to 1/16 inch of lace beyond the hairline to allow natural blending. Pluck sparsely if you prefer a more realistic hairline, but avoid over-plucking which can leave gaps.
Tip:
If you wear adhesive frequently, rotate the placement slightly each time to preserve natural hair and avoid repeated stress in one area.
Step-by-step: Classic glue application for a secure lacefront
Below is a reliable method many professionals use when asked how to glue a front lace wig. Follow each step carefully and allow adhesives to reach a tacky state where required.
1. Clean and prep
Wipe the skin along the hairline with isopropyl alcohol to ensure a clean bonding surface. If you use a barrier product, apply it now and let it dry fully.
2. Mark the hairline
Using a tiny amount of eyeliner or a washable makeup pencil, trace where you want the wig to sit. This keeps you from applying adhesive outside the desired area.
3. Apply adhesive
Apply a thin or medium layer of lace glue along the hairline using a micro brush or the adhesive applicator. Some prefer two thin layers rather than one thick one. Wait for the glue to become tacky — typically 30 seconds to 2 minutes depending on product. You can test tackiness by gently touching with a clean fingertip; it should feel sticky but not wet.
4. Position the lace
Carefully place the lace onto the tacky glue starting in the middle and smoothing outward toward the ears. Use a tail comb or your fingertip to press gently onto the glue, working in small sections. Avoid stretching the lace.
5. Secure and dry
Use a blow dryer on cool or low heat to set the bond, or simply press with a satin scarf for 5-10 minutes. A cool blow dry reduces lifting and helps glue settle under the lace. If you see any gaps, add a tiny dot of glue and press again.
6. Blend the hairline
Once fully set, trim any excess lace close to the hairline with small, sharp scissors if you left extra. Use foundation or concealer that matches your scalp tone to lightly dust the lace for a skin-like appearance. Finish by styling baby hairs to frame the face and enhance the illusion of a natural hairline.
Alternative: Tape method for quick application
Wig tape offers a faster, often less messy option and is ideal for those new to bonding. Clean the skin, measure and cut tape strips to fit the hairline area, apply to the perimeter of the wig cap, remove backing, and press down onto the skin. Tape is excellent for short-term wear or event styling but may need replacement more frequently than glue-based methods.
Gel glue and brush application
Gel adhesives are favored by many because they provide a strong hold and are easier to remove than solvent adhesives. Use a thin brush to apply the gel in precise lines along the hairline and wait for tackiness. Gel glue often peels off with oil-based removers, which reduces trauma at removal time.
Common mistakes and how to avoid them
- Overapplication of glue: Thick layers take longer to dry and create lumps under the lace. Use thin layers and build if necessary.
- Skipping skin prep: Oil and residue cause lifting. Always clean skin first.
- Not waiting for tackiness: Placing lace on wet glue can cause slippage and uneven adhesion.
- Excessive heat: High heat can weaken adhesive properties; use cool or low heat only.
- Improper removal: Peel-off without remover can pull hair and damage lace. Use recommended removers and take time to dissolve glue.
Removal: Protecting your edges
Proper removal preserves the lace and your natural hair. Use a recommended adhesive remover or oil-based cleanser applied along the hairline. Wait a minute or two for the glue to loosen, then gently peel the lace back while applying remover to stubborn spots. Never rip a lace off quickly; patience prevents hair loss and lace damage.
Long-term care and maintenance
To prolong the life of a lace front and keep the bond strong, clean adhesive residue from both skin and lace after each wear. Use gentle, non-abrasive methods to clean the lace and store the wig on a mannequin head or stand to keep its shape. Rotate between glues and tape methods occasionally to avoid constant chemical exposure to one area of your scalp.
Choosing the right adhesive
Select adhesives based on skin sensitivity, duration of wear, and activity. Medical-grade glues offer strong, long-term hold but often require special removers. Lace adhesives marketed as "easy removal" or "sensitive" reduce irritation. Always patch-test a new product on your wrist or behind your ear 24 hours prior to full application to check for allergic reactions.
Styling after bonding
After your lace is glued, you can style as usual. Use lightweight products near the hairline to avoid weakening the bond. For heat styling, avoid high temperatures near the glue area. If you need to reapply glue near roots after a few days, remove residual oils and re-apply a thin bead to refresh the hold without stripping the original bond.
How to glue a front lace wig for active lifestyles
If you exercise frequently or sweat heavily, choose a stronghold adhesive made to resist moisture and consider adding a thin layer of lace tape under the front edge for extra support. Use waterproof or sweat-resistant adhesives and secure edges with small dots of glue at the temples and behind the ears where tension is highest.
Professional tips for a natural hairline
- Pluck strategically: Create a subtly irregular hairline for realism.
- Create baby hairs: Short trimmed lengths at the perimeter soften the transition and hide the lace edge.
- Tint lace: Use lace tinting products or foundation powder on the lace to match skin tone.
- Prevent shine: If the lace appears shiny after glue, use a light dusting of translucent powder to reduce glare.

Troubleshooting lifting and edge issues
Lift at the temple? Add a dot of glue behind the lifted area and press until set. If the lace lifts after a day of wear, clean the area with alcohol, reapply a thin layer of adhesive, and press down to seal. Persistent lifting may indicate oils on the skin or improper glue selection — revisit prep and product choice.
Safety and health considerations
Always avoid getting adhesive in the eyes or open wounds. Use products labeled skin-safe and follow manufacturer guidance. If you experience burning, itching, or swelling, remove the lace immediately and consult a healthcare professional. For scalp sensitivity, consider non-adhesive options like wig grips or adjustable bands.
Budget-friendly glue alternatives
If you're on a budget, some users find success with multi-purpose adhesives designed for cosmetics, but these may not provide the same hold or skin safety as products formulated specifically for lace. Test carefully, and never substitute an unknown product on delicate facial skin without patch testing.
Checklist: Quick reference for a flawless glue job
- Clean skin thoroughly with alcohol
- Trim and/or pluck lace for natural hairline
- Mark placement and apply thin adhesive lines
- Wait for tackiness before placement
- Press and dry with cool air or satin wrap
- Blend with makeup and create baby hairs
- Remove carefully with proper remover
How to glue a front lace wig: Summary of best practices
Consistency in preparation, product choice, and patience during application are the keys to a professional finish. Always clean skin, use thin adhesive layers, test glue tackiness, and take time during removal. By following the steps above and tailoring them to your scalp sensitivities and lifestyle needs, you'll achieve a reliable, natural-looking bond that lasts.
Recommended products and finishing tools
Consider investing in: a medical-grade lace adhesive for long wear, gel glue for easy removal, quality double-sided tape for convenience, a dedicated lace tint or foundation, and a fine-tooth rat-tail comb to position edges precisely.
Advanced techniques for pros and enthusiasts
Experienced stylists sometimes apply two different adhesives — a longwear glue on the perimeter and a lighter gel near the ears — to balance hold and comfort. Another advanced tip is to build a "glue strip" on the wig cap itself during wig construction, creating a seamless pre-bonded edge that simplifies the daily application process.
how to glue a front lace wigPractice makes perfect: try a few dry runs without glue to refine placement and trimming. Over time you'll develop a rhythm and find the exact adhesives and tools that suit your skin and style. Remember that less is more with adhesive application — precision beats quantity.
FAQ
Q: How long should lace adhesive hold if applied correctly?
A: With proper application, a high-quality lace adhesive can last anywhere from 3 days to 2 weeks depending on the product and daily activity level. Waterproof and medical-grade adhesives typically last longer.
Q: Can I swim with a glued lace front?
A: Some waterproof adhesives are formulated to resist moisture and swimming, but exposure to chlorine, salt water, and vigorous activity may still weaken the bond. Perform a patch test and consider tape reinforcement for extended water exposure.
Q: What’s the safest way to remove stubborn glue?
A: Use a recommended adhesive remover or oil-based remover. Apply to the edge, let it penetrate for a minute, and gently peel the lace while adding more remover as needed. Avoid forceful ripping.
Related products
Blog
- How to Wear Wig with Short Hair Made Easy Expert Tips for a Flawless, Natural Look
- How a wig can transform your look and why a wig is worth every penny
- Honey Blonde Side Part Wig Buying Guide and Styling Tips to Achieve Natural Volume
- does dana perino wear a wig Examining the Rumors Photo Evidence and Hairstyle Insights
- what to do after washing wig - essential aftercare steps and quick styling tips for long-lasting shine
- where can i buy wigs online A definitive guide to the best shops tips for choosing the perfect wig and top deals
- what is the best shampoo for human hair wigs answered by top stylists plus product picks and easy care tips
- how to style a cosplay wig Complete step by step guide with pro tips for cutting heat styling and long lasting hold