how to remove lace front glue from wig safely 10 proven methods to protect the lace and hairline
Safe steps and strategies for removing buildup from lace wigs
Removing adhesive residue without damaging delicate lace or the hairline requires a careful approach. This guide explains in detail how to remove lace front glue from wig with multiple safe techniques, preventative measures, and aftercare instructions to keep your lace and strands intact. The goal is to offer practical options so you can choose the method that best matches the type of glue used, the lace material, and your comfort level.
Why proper removal matters
Adhesives used on lace front wigs bond close to the scalp and hairline. Aggressive scraping or harsh chemicals can tear lace, lift knots, or weaken hair fiber. Learning how to remove lace front glue from wig correctly protects both your investment and your natural hairline. This article outlines each step and explains the science behind gentle removal.
Key considerations before starting
- Identify the glue type: water-based, alcohol-based, latex, or medical-grade adhesives behave differently.
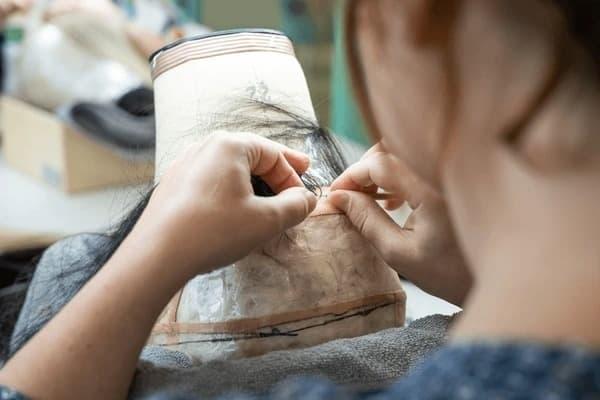
- Check lace type: Swiss lace is thinner and more fragile than HD lace.
- Test small area first: Always try a patch test to ensure the solvent or method won’t discolor lace or hair.
- Gather tools: soft cotton swabs, adhesive remover, rubbing alcohol, oil, micellar water, toothbrush, and a plastic scraper or edge comb.
Safety and scalp health
Protect your skin by wearing a barrier cream or petroleum jelly on the perimeter of your natural hairline if the wig is on. Avoid forcing glue off; patience reduces risk. If you have sensitive skin or open wounds, consult a dermatologist before proceeding.
10 proven methods: step-by-step options for safe glue removal
The following methods range from the gentlest to more intensive options. Each method includes pros, cons, and tips for protecting the lace and hairline.
1. Warm water and mild shampoo (best for water-soluble adhesives)
Procedure: Fill a bowl with comfortably warm water, add a few drops of sulfate-free shampoo, and soak the lace edge for 10-20 minutes. Gently rub with fingertips or a soft toothbrush to lift softened glue. Rinse and pat dry.
Why it works: Water-soluble and many water-based adhesives break down with extended moisture exposure.
Protective tip: Avoid rubbing aggressively; instead use repeated soak-and-soften cycles.
2. Oil-based removers: coconut oil, olive oil, or baby oil
Procedure: Apply oil directly along the glue line with a cotton swab and allow it to penetrate for 10-30 minutes. Gently massage the lace and scrape off residue with a soft plastic tool or a fingernail wrapped in fabric.
Why it works: Oils dissolve adhesive bonds and lubricate the area, reducing tearing risk.
Note: Oils can leave residue; wash the wig after removal with a clarifying shampoo to restore lift and prevent slippage when reapplying adhesive.
3. Commercial adhesive removers specifically formulated for lace wigs
Procedure: Follow product instructions. Typically spray or apply with cotton swab, wait a few minutes, then gently wipe away the glue.
Why it works: Professional removers are balanced to dissolve strong adhesives without damaging lace.
Precautions: Choose a remover compatible with lace type; perform a patch test on a hidden area.
4. Medical-grade adhesive removal wipes
Procedure: Use wipes to rub along the glue line until it dissolves.
Why it works: These wipes contain solvents designed to safely remove medical adhesives from skin and similar materials.
Tip: Ideal for sensitive scalps. Follow up with a gentle wash to remove residue.
5. Isopropyl alcohol for stubborn spots (use sparingly)
Procedure: Dip a cotton swab in 70% isopropyl alcohol and lightly dab on the glue spot. Avoid prolonged saturation. Immediately blot and then neutralize with oil to prevent drying lace fibers.
Why it works: Alcohol dissolves certain adhesive components and removes oils and build-up.
Warning: Alcohol can dry or discolor some lace materials; only use on small spots and rinse promptly.
6. Steam method for softened glue
Procedure: Carefully hold the lace edge near steam (e.g., from a kettle) to soften glue, then gently wipe away with an oil-soaked cotton pad.
Why it works: Heat softens the adhesive, making it easier to remove without harsh chemicals.
Safety: Keep distance to avoid burning the lace or your fingers.
7. Micellar water and gentle soap combo
Procedure: Apply micellar water to a cotton pad and rub along the glue line. Follow with a run of soapy water to lift remaining residue.
Why it works: Micellar water collects and lifts oil-based glues while being mild on delicate materials.
8. Baking soda plus oil paste for tough deposits
Procedure: Mix a small amount of baking soda with coconut or olive oil into a paste. Apply to the glue line, massage gently, and remove residue with a soft brush.
Why it works: Baking soda acts as a mild abrasive while oil dissolves adhesive. Use sparingly to avoid abrasion of ultra-thin lace.
9. Commercial enzymatic or biodegradable cleaners
Procedure: These cleaners are designed for organic adhesives; apply as directed, allow dwell time, then rinse.
Why it works: Enzymes target adhesive binders without harsh solvents.
Eco note: Many of these products are biodegradable and safer for repeated use.
10. Professional salon removal
Procedure: Take the wig to a trained stylist for expert removal, especially for expensive lace types or medical adhesives.
Why it works: Professionals have access to salon-grade removers, tools, and techniques to minimize risk and repair lace if necessary.
When to choose: If the lace shows signs of tearing, heavy embedment, or if you're unsure about at-home solvents.
How to protect the lace and hairline during removal
Preserving the lace and hairline is as important as removing glue. Follow these protective steps: use a barrier (petroleum or specialized skin protector) on the scalp when the wig is worn, avoid metal tools close to the lace, choose soft applicators, and always remove residue slowly in the direction of hair growth. When using solvents, work in small sections and blot frequently rather than saturating the lace.
Gentle tools that help
- Silicone-tipped applicators
- Plastic or bone combs instead of metal
- Soft-bristled toothbrush for gentle scrubbing
- Microfiber cloths for blotting
Aftercare for cleaned lace wigs
Once glue is removed, shampoo gently, use conditioner on the hair (avoiding the lace base if possible), and air-dry on a wig stand to preserve shape. If lace appears thin or worn, consider reinforcing with a lace adhesive extender or a thin patch on the underside to distribute future adhesive pressure.
Common mistakes to avoid
- Peeling or scraping forcefully—this can cause tears and hair knot loss.
- Overuse of harsh solvents like pure acetone—these damage lace and hair fibers.
- Not testing a remover on an inconspicuous area.
- Skipping post-removal cleaning—residue can cause irritation and build-up.
Signs that you should stop and seek help
If the lace frays, knots pull out, or the texture changes quickly while using a remover, halt immediately. Professional repair or replacement might be necessary at that point. If irritation or a chemical reaction appears on the scalp, rinse thoroughly and seek medical advice.
Quick decision guide: choose a method based on glue type
Water-based adhesives: Start with warm water and gentle shampoo or micellar water.
Latex or tacky adhesives: Oil-based removers or commercial adhesives designed for latex work well.
Medical-grade or strong prosthetic glues: Use specialized adhesive removers or go to a salon.
Unknown or mixed buildup: Start mild (oil/micellar water), escalate carefully, and patch test regularly.
Eco-friendly and skin-safe alternatives
If you prioritize gentle formulations, seek plant-based adhesive removers or biodegradable enzyme cleaners. Many brands now offer alcohol-free and sulfate-free options formulated with skin sensitivity in mind.
Maintaining your wig after glue removal
After a thorough cleaning and drying cycle, condition the hair fibers and, if the lace needs strengthening, consider a clear lace seal or thin layer of wig glue distributed evenly under the lace to prevent direct pressure on a single area. Store the wig on a stand away from heat and dust.
How often should you perform deep glue removals?
Deep removal is needed whenever adhesive build-up affects fit, comfort, or appearance. For regular users, a monthly maintenance cleaning may be sufficient; for heavier wear or stronger adhesives, plan for more frequent gentle maintenance and professional check-ups twice a year.
Key takeaways
Understanding how to remove lace front glue from wig safely helps extend the life of your lace and hairline. Start with the gentlest method, test patch, and escalate carefully. Use oils and commercial removers when appropriate, and consult professionals for high-strength adhesives or damaged lace. Preserve scalp health by using barrier products and avoid harsh solvents that dry or break down lace materials.
Extra tips for flawless results
- Work in a well-lit area and use magnification for fine lace inspection.
- Keep a record of products and methods that worked best for each wig.
- Label wig caps with adhesive history—some glues require specific removers.
Recommended products (general categories)
Look for: alcohol-free adhesive removers, oil-based formulas designed for wig care, micellar water for sensitive skin, enzymatic cleaners, and silicone applicators for precise work. Avoid pure solvents like acetone or nail polish remover on lace.
When to replace lace instead of repairing
If lace has multiple tears, extensive discoloration, or persistent adhesive staining that bleaching cannot remove without causing brittleness, professional replacement or a new lace unit may be more cost-effective than continued repair attempts.
Final checklist before you begin removal

Checklist: patch test remover, gather soft tools, protect scalp edges, work in small sections, and rinse or neutralize solvents after removal. Take photos before and after to document condition for future reference.
FAQ
A1: Olive oil is effective on many adhesives but may not dissolve strong medical-grade glues. It's a low-risk starting point; follow with a shampoo to remove oil residue.
A2: Allow at least 24 hours of rest and cleaning for the lace and scalp. Make sure the lace is fully dry and free of oils or remover residue before applying new adhesive.
A3: Repeated harsh or abrasive removal can weaken lace. Use gentle solvents, vary adhesive placement, and consider professional reinforcement to reduce wear.
Related products
Blog
- Ultimate Styling Guide for a honey blonde wig with dark roots to Look Effortlessly Natural
- From courts to salons why did colonial men wear wigs and what those wigs revealed about power fashion and identity
- U Part Wig Styling Guide for Effortless Natural Looks and Long-Lasting Wear
- Investigative Guide does hogan gidley wear a wig and How to Spot the Evidence
- how to stop a wig from shedding 10 Easy Pro Tips to Prevent Hair Loss and Keep Your Wig Looking Fuller Longer
- Ultimate buyer guide how expensive are good wigs and where to find the best value
- where is soul lady wigs located near me - Find Nearby Stores, Hours, Map and Customer Reviews
- Discover what is the best lace wig glue for long lasting hold expert tips and top product picks