How to Make Your Own Wigs Using Simple Supplies and Step by Step Tips for Beginners
how to make your own wigs: beginner-friendly guide to DIY hairpieces
Learning how to make your own wigs can be empowering, economical, and creatively rewarding. This comprehensive guide walks you through essential supplies, step-by-step processes, and smart tips so beginners can assemble durable, natural-looking hairpieces using simple tools. Whether you want a lace front, full lace, or a machine-wefted cap, understanding the fundamentals will accelerate your success. Below you'll find a clear roadmap, useful techniques, and styling and maintenance advice that help you avoid common pitfalls.
Why craft your own wig?
There are many compelling reasons to learn how to make your own wigs. Crafting your own allows for total customization of density, length, color, cap shape, and hair direction. It often saves money compared to boutique purchases and gives precise control over hairline realism, parting, and cap ventilation. For hobbyists and professionals alike, handmaking wigs builds skills in pattern making, knotting, and finishing that translate to better results for clients or personal wear.
This article balances practical steps and creative suggestions. It is structured so beginners can start with an easy, sew-in weft wig and progress to ventilated lace caps as confidence increases. Read on to review materials, follow a step-by-step construction plan, and learn finishing touches that make a wig look bespoke.
Essential supplies and tools
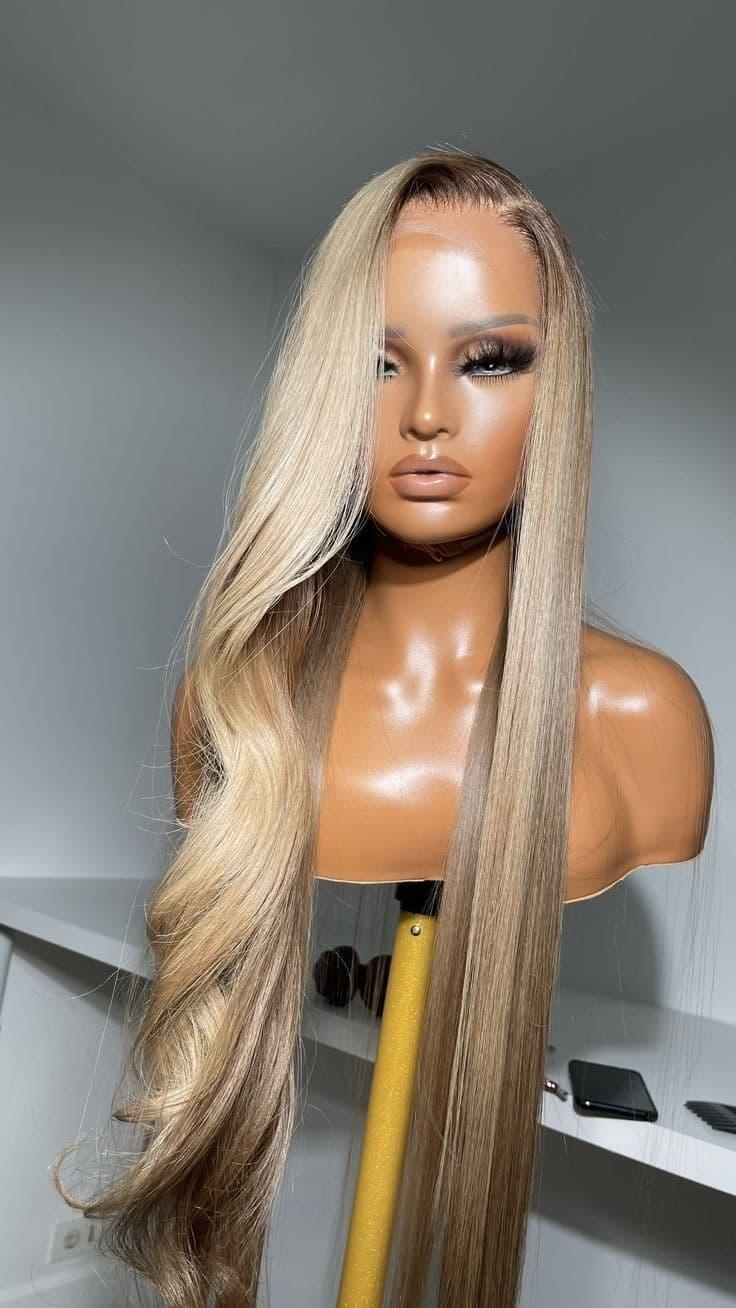
- Wig cap or wig block: breathable mesh caps or a mannequin head for styling.
- Hair: synthetic or human hair bundles, lace front or full lace depending on the design.
- Sewing supplies: curved needle, strong thread (nylon or polyester), scissors, clips.
- Adhesives & accessories: wig glue or tape for lace fronts, elastic band for secure fit, wig combs.
- Finishing tools: thinning shears, flat iron (for human or heat-resistant synthetic), steam tools.
- Measuring & marking: tape measure, tail comb, fabric marker or clips for sectioning.
Choosing materials: hair type and cap structure
Deciding between synthetic and human hair impacts technique and longevity. Human hair is heat-styling friendly and can last longer with proper care. High-quality synthetic hair is affordable and pre-styled but less tolerant of heat. Cap types matter: machine-sewn weft caps are faster to make and great for beginners; lace caps require hand-knotting or ventilating but offer the most natural hairlines. Start with a basic weft cap to practice constructing a stable foundation, then try lace sections for a natural part.
Cap basics and measurements
Precision in measuring ensures comfort and realistic drape. Measure head circumference, ear-to-ear across the forehead, and nape-to-crown length. Note hairline shape and temple placement. Use these dimensions to cut a wig cap pattern or to size a purchased cap before applying wefts. A well-fitted cap reduces the need for heavy styling or concealment and improves the overall look.
Step-by-step process: sew-in weft wig (beginner-friendly)
- Prepare the hair: Sort and align hair bundles; remove tangles. If using wefted hair, steam or press the wefts flat so they lay neatly on the cap.
- Secure the cap: Place the wig cap on the mannequin head and pin or clip to prevent movement. If you're making a cap from scratch, sew the front and back panels together following your measurements.
- Mark guideline rows: Using a tail comb, mark horizontal rows around the cap from nape to crown. These act as sewing guides and ensure even density.
- Sew the wefts: Starting at the nape, sew hair wefts along each guideline using a curved needle and strong thread. Use tight, consistent stitches to anchor the weft without puckering the cap fabric. Overlap short ends to avoid gaps.
- Build density gradually: Add layers, stopping to check the fit and hair flow. For thinner looks, space the wefts; for fuller styles, place them close together. Blend hair lengths to avoid a bulky ridge where wefts meet.
- Finish the hairline: For a more natural frontal edge, cut a frontal lace piece to match the cap, or create a small, hand-stitched hairline using single-strand knotting techniques for realism.
- Trim and style: Remove the wig from the block, trim excess cap material, and shape bangs or layers with thinning shears and blending scissors. Style with low heat on quality tools if using human hair.
Advanced technique: ventilating a lace section
Ventilating (hand-knotting) is used to attach individual strands into lace for a natural look at the hairline and parting. While time-consuming, a few rows or a frontal ventilated area dramatically improves realism. Beginners should practice on mesh scraps: use a small ventilating hook to pull a single hair through a lace hole and tie a secure knot. Keep knot size tiny and consistent. A lightly bleached knot can help disguise the root if you're working with dark follicles and lighter lace.
Glue, tape, and elastic: secure attachment techniques
how to make your own wigs also includes learning attachment methods. Lace-front wigs are often affixed with medical-grade adhesives or double-sided tape for a temporary secure hold. Sew-in and elastic band methods are non-adhesive and kinder to the skin. When using glue, always test a small area for sensitivity and follow manufacturer directions. Use an adjustable elastic band sewn into the cap under the hairline for extra hold during activities or wind exposure.
Breathability and comfort tips
Comfort is key to regular wear. Ensure the cap uses breathable mesh, add adjustable straps, and avoid long-term glued applications if you have sensitive skin. Padding at pressure points and an inner silk layer can reduce friction, protect delicate hair, and increase wearability.
Coloring, blending, and matching
Color matching is a creative step that makes a wig appear bespoke. For human hair, standard coloring techniques apply—consult a colorist for complex shade blending. For synthetic hair, pre-dyed options save time. Consider lowlights and highlights placed strategically near the face and part to mimic natural hair depth. When combining bundles, match texture and density for seamless transitions.
Styling for realism
- Directional hair growth: Sew or ventilate hair to mimic natural growth patterns—cowlicks, part direction, and crown swirl are important.
- Thin at the hairline: Razor-thinning or small layer cuts can soften a heavy frontal appearance.
- Create lace contours: Pluck sparse areas along part lines and hairlines to reduce uniformity and suggest natural shedding.
Maintenance and longevity
Proper care extends the life of handmade wigs. Wash human hair wigs with sulfate-free shampoo and deep-condition occasionally, detangling from ends to roots. Store wigs on a stand away from heat and sunlight. For synthetic wigs, use recommended fabric softeners and avoid high heat. Rotate wigs to reduce friction wear and refresh wefts with touch-up stitches when needed.
Common mistakes beginners make and how to avoid them
- Uneven weft spacing: Use chalk or clips to maintain consistent row spacing.
- Too-dense cap: Overcrowding wefts creates bulky, unnatural shapes. Plan density to suit the style.
- Ignoring hair direction: Study natural hair growth and replicate it during sewing or ventilating.
- Poorly finished hairline: Practice small-scale ventilating or install a commercial lace frontal to improve the visible edge.
Tips for efficient practice sessions
Start with short practice sessions focused on a single skill: sewing a straight weft, tying a tiny knot, or cutting a natural-looking perimeter. Keep a practice cap, mesh scraps, and low-cost synthetic hair for experimentation. Track progress with photos and notes on stitch tension, knot size, and weft placement. With repetition, speed and precision will improve.
Budget planning and time estimates
how to make your own wigs can be surprisingly affordable if you plan. A basic sew-in weft wig with synthetic hair can be built for under a modest budget, while human hair and ventilated lace can raise costs significantly. Time estimates vary: a simple machine-sewn wig may take 3-6 hours for a beginner; a hand-ventilated lace frontal could take 20-80+ hours depending on coverage and density. Factor labor time when valuing your finished piece.
Creative variations and upcycling ideas
Experiment with hybrid wigs combining machine-sewn caps and hand-ventilated frontals, or repurpose a damaged store-bought wig by rewefting or ventilating the hairline. Add extensions, clip-ins, or braided sections to create versatile looks. Reusing high-quality human hair after careful detangling and cleansing can reduce waste and cost.
Checklist before you start a full wig
- Accurate head measurements and a chosen cap pattern
- Hair bundles matched by color, texture, and length
- Curved needle and quality thread
- Mannequin head or wig block for secure construction
- Basic finishing tools: scissors, thinning shears, combs
- Protective materials: gloves, cape, and adhesive remover (if needed)
How to present and photograph your finished wig
Good presentation improves perceived quality. Use a neutral backdrop, adjust lighting to avoid harsh shadows, and style the wig on a well-fitted mannequin or a real model. Show close-ups of the hairline, parting, and cap interior to highlight craftsmanship. Include before-and-after shots if you performed a refit or repurpose.
Next steps: progress from beginner to advanced
After mastering a basic sew-in weft wig, progress to a full lace cap with ventilated parting and front. Study knot-bleaching techniques, multi-directional parting strategies, and advanced styling methods like hand-tied buns and integrated closures. Join online communities to exchange patterns, troubleshooting tips, and time-saving methods.
Pro tip: Keep a small notebook of knot sizes, thread tensions, and weft brands; this quick reference speeds repeatability for future projects.
Resources and learning pathways
Enroll in local wig-making classes or follow detailed video tutorials focusing on ventilating and lace application. Purchase practice kits that include mesh swatches and small hair samples to avoid wasting full bundles. Use trusted suppliers for human hair to ensure consistent quality and color matching over time.
SEO note on content discoverability
Including targeted phrases such as how to make your own wigs within headings, subheadings, and emphasized text helps search engines associate this page with practical wig-making queries. Pair the phrase with related terms like "ventilating," "weft sewing," "lace frontal," and "wig cap measurements" to broaden relevance and attract varied search intents.
Practical project: a condensed beginner build plan
- Gather all materials, measure, and mark the cap.
- Sew nape weft and work upward in even rows.
- Install a lace frontal or hand-knot the first two inches along the hairline for a natural look.
- Trim and texturize to match the desired style.
- Attach elastic and test the fit on the head form before final styling.
By repeating this condensed project you will internalize stitch patterns and speed up production while improving aesthetics. Remember: patience and consistent practice are the most important tools.
Final words of encouragement
Wig-making combines craft, anatomy, and artistry. As you learn how to make your own wigs, accept mistakes as teaching moments; every imperfect hairline or uneven row is a step toward mastery. Build a small portfolio, collect feedback, and gradually take on more complex commissions. With time you can create wigs that rival store-bought pieces in realism and comfort.
FAQ
Q: What is the simplest type of wig for a complete beginner?
A: Start with a machine-sewn weft cap using synthetic bundles. It's faster to assemble, teaches row placement, and allows you to practice cap shaping before attempting lace ventilation.

Q: How long does it take to make a basic wig?
A: For beginners, a basic weft wig may take 3-6 hours. Lace-front or hand-ventilated pieces require much more time, sometimes dozens of hours depending on the amount of hand-knotting.
Q: Can I use heat tools on all wigs?
A: Only human hair and heat-resistant synthetic fibers can sustain styling irons. Always check fiber specifications and use a heat protectant if the hair permits heat styling.
Related products
Blog
- how to clean a lace wig step by step with pro tips for soft natural results
- what is density in a wig explained - expert guide to choosing the right hair volume and styling tips
- Ultimate Wig Cap Buying Guide 2025 How to Choose the Best Wig Cap for Comfort Fit and Durability
- what are monofilament wigs - Complete Guide to Benefits, Maintenance and Styling Tips
- how do i put on a lace front wig step-by-step tutorial to secure a natural look in minutes
- how to measure cap size for wig a beginner friendly step by step guide for a perfect fit
- How a wig can transform your look and why a wig is worth every penny
- how to secure a wig with bobby pins effectively every time simple step by step guide with pro tips