Pro tips on how to curl a wig with a flat iron for long lasting natural waves
Mastering the Technique: Essential Guidance
This comprehensive guide explains practical, salon-level techniques and pro tips on how to curl a wig with a flat iron that produces long-lasting, natural-looking waves. Whether you work with heat-friendly synthetic fibers or human hair wigs, understanding preparation, heat control, and styling sequence makes all the difference. The goal is to leave you confident about creating waves that hold, appear natural, and maintain wig integrity over time. Below you will find step-by-step instruction blocks, troubleshooting sections, product recommendations, and longevity hacks designed with SEO-friendly structure and keyword prominence to help readers and search engines alike locate trustworthy information about how to curl a wig with a flat iron.
Why use a flat iron instead of other tools?
Flat irons offer controlled heat, precise tension, and versatility. With the right technique, a flat iron can create soft waves, tight spirals, or beachy texture without the bulk of a curling iron. In addition, a flat iron allows easier manipulation of section size and wrist rotation, which contributes to varied wave shapes for more natural finishes. When learning how to curl a wig with a flat iron, appreciating the flat iron's advantages is the first step to better results.
What you'll need before styling
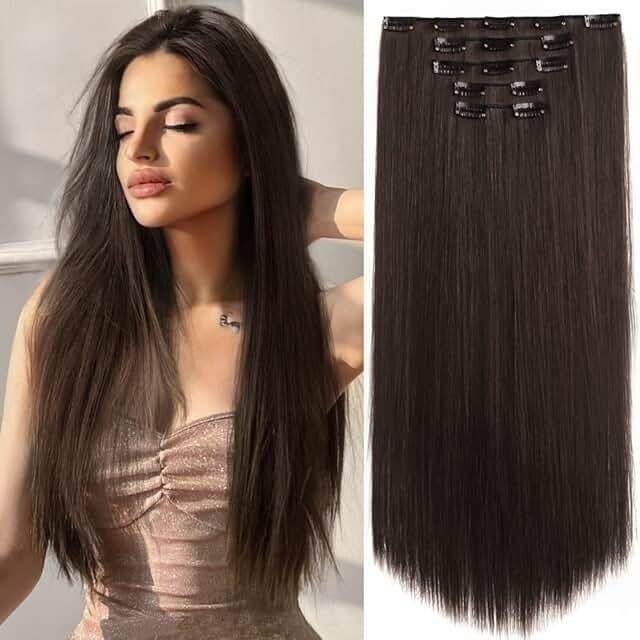
- Quality flat iron: Ceramic or titanium plates, adjustable temperature, and narrow plates for shorter wigs or tighter curls.
- Heat protectant spray: A lightweight, even-coverage thermal protector that suits synthetic or human hair types.
- Wig stand or mannequin head: Stabilizes the wig and mimics head shape for accurate styling.
- Sectioning clips and a comb: For uniform sections and detangling.
- Finishing products: Lightweight hairspray, texturizing spray, and serum for shine control.
- Optional: Mousse or setting lotion for additional hold, and small elastic bands for heat-set methods.
Preparation steps to extend longevity
Preparing the wig properly is vital when learning how to curl a wig with a flat iron for durable waves. Start by washing the wig if it's been exposed to styling residue. For human hair wigs, use a sulfate-free shampoo and a lightweight conditioner; for heat-friendly synthetic wigs, follow manufacturer instructions and use a synthetic-specific detangler. Always dry the wig completely on a wig stand to preserve its shape. Next, apply a heat protectant in an even, mist-like manner; avoid oversaturating the fiber to prevent stiffness. Comb through from ends to roots to remove tangles and divide hair into 8–12 sections depending on wig density and curl type desired.
Choosing the right temperature
Temperature control is one of the most important factors when working out how to curl a wig with a flat iron. For heat-friendly synthetic wigs, choose the lowest effective temperature recommended by the manufacturer—often between 250°F and 320°F (120–160°C). For human hair wigs, start around 300°F (150°C) for fine hair and 350°F–375°F (175–190°C) for coarse or resistant textures. Never assume higher heat equals better hold; using excessive heat risks permanent damage. A digital flat iron with accurate temperature readout improves repeatability and safety.
Step-by-step curling method: Classic rotation technique
- Sectioning:
 Clip the wig into workable panels—bottom layer, middle, crown, and face-framing pieces. Use smaller sections for tighter, longer-lasting waves and larger sections for relaxed, beachy movement.
 - Clamp and rotate: Take a 1-inch strand (or appropriate width for desired wave). Clamp the flat iron near the root, angle the plates slightly, and rotate your wrist 180° away from the face while slowly gliding down the hair. The speed and rotation determine the curl tightness: slower glide and full rotation yield tighter curls; faster glide with partial rotation yields looser waves.
- Alternate directions: For a natural look, alternate the rotation direction on adjacent sections or alternate every other strand. This subtle variance prevents a uniform, "barrel-curl" look and emulates real hair that naturally layers in opposing directions.
- Root-to-tip tension: Maintain even tension without pulling. Tension affects the curl's definition; too much tension can create an unnatural "bent" pattern, while inconsistent tension leads to uneven hold.
- Finish sets: After curling each layer, pin curls or wrap sections around your finger and clip them to cool. Allowing curls to cool completely in place locks the shape better, producing longer-lasting waves.
Alternate method: Flat iron bend technique
The bend technique creates softer, lived-in waves. Clamp the strand, make a subtle S-shape by bending the flat iron outward then inward along the strand for 1–2 seconds each bend, and slowly move down. This technique works especially well on mid-length to long wigs and is useful for hair types that resist curling. The bend method is central to mastering varied textures when applying how to curl a wig with a flat iron techniques.
Finishing touches for natural movement
Once all sections have been curled and cooled, release any pinned curls gently. Use wide-tooth comb or your fingers to loosen curls into soft waves. Apply a light mist of flexible-hold hairspray at arm's length to maintain movement while reducing frizz. For added shine without weighing hair down, use a pea-sized amount of lightweight serum on the mid-lengths and ends—avoid the crown to prevent greasiness. To emphasize texture, scrunch the hair lightly with a texturizing spray, then set with a quick, light mist of hairspray.
Heat-friendly synthetic vs human hair: differences to remember
When practicing how to curl a wig with a flat iron, always identify the wig type. Human hair behaves more like natural hair: it tolerates higher heat, smooths quicker, and holds curl differently. Heat-friendly synthetics have a narrower heat tolerance and often require lower temperatures and shorter contact times; some modern fibers respond well to heat but can still suffer from repeated high-temperature exposure. Label or test a hidden strand first, setting the iron to a lower temperature and checking for shine loss or fiber melting.
Tips for longer hold
- Cool set: Always allow curls to cool completely pinned or clipped for maximum longevity.
- Product layering: For persistent hold, start with a mousse or heat-activated setting spray before curling, then finish with texturizer or flexible-hold spray.
- Use smaller sections for tighter hold and larger sections for relaxed waves.
- Sleep care: Use a silk bonnet or place the wig on a silk pillow to reduce friction if wearing to bed, or put the wig on a hanger and use a silk scarf to keep shape overnight.
Common mistakes and how to avoid them
Avoid these common errors to improve your results when learning how to curl a wig with a flat iron:
- Using excessive heat: Damages fibers and reduces the wig's lifespan.
- Rushing the cooling process: Not cooling curls > less hold.
- Skipping heat protectant: Leads to dryness and frizz.
- Sectioning inconsistently: Causes uneven waves.
Problem solving: Frizzy curls, limp hair, or uneven waves
If curls become frizzy, reapply a small amount of anti-frizz product and smooth lightly with the flat iron at a low temperature on a problem strand. If waves fall limp quickly, repin and re-cool each problematic section, or add a light volumizing powder at the roots. For overly uniform curls, break pattern with finger combing and light brushing, or use a straightening motion through mid-lengths to soften tightness.
Styling variations for length and density
Short wigs: Use smaller, narrow flat irons and tighter sections for consistent hold. Micro waves near the face can be made with a smaller plate iron or by twisting sections around the iron before gliding.
Medium length: Alternate rotation directions and vary section sizes for multi-dimensional texture. Employ the bend technique on mid-lengths for natural waves.
Long wigs: Work in more layers, use pins to cool long sections, and finish with longer cooling time. Consider using a warmer (but safe) temperature on thicker hair and always use a heat protectant.
Maintaining waves over time
To keep waves lasting days, refresh waves with low-heat touch-ups, use a lightweight spray to re-texturize, and avoid over-washing. When cleaning is required, use protective, sulfate-free shampoos and deep condition periodically for human hair wigs. For synthetics, use specialized cleansers and conditioning sprays. Store wigs on a stand or mannequin head to preserve the wave pattern between wears.
Tools and product recommendations
- Ceramic flat iron with adjustable temperature and 1–1.25" plates for versatility.
- Heat protectant: Select a weight and formula suited to wig fiber—light mist for synthetics, richer serum for coarse human hair.
- Flexible-hold hairspray: For movement without stiffness.
- Texturizing spray or sea-salt spray: For added grip and lived-in look.
- Lightweight shine serum or oil: For polished ends only.
Professional shortcuts and time savers
Batch the process: Curl the underside and pin large sections to cool while you work on the crown. Use thermal rollers or clips to set major sections quickly before doing detail work. Keep a second wig stand and a quick-access styling station for faster turnaround. Skilled stylists blend heat techniques with finger-waving and braiding to create multi-dimensional waves that flat iron alone might not achieve.
Safety and care best practices
Always unplug tools when not in use, place the flat iron on a heat-resistant pad to avoid surface burn marks, and test a hidden strand when experimenting with temperatures. For wigs with glued lace fronts, avoid direct heat contact with glue areas—use a low setting and short contact duration. Regularly detangle wigs prior to styling to prevent pulling and fiber breakage.
Checklist before you start
- Wig is clean and fully dry.
- Heat protectant is applied.
- Flat iron is set to a suitable temperature.
- Sectioning clips and a comb are ready.
- Wig is secured to a stand or head.
Advanced techniques to try
Heat-set braids: Braid damp synthetic wigs and apply low heat (if fiber allows) to create soft waves. Reverse-wrap method: Wrap hair in opposite directions and use the flat iron to smooth bends for modern S-curves. Root-lift teasing before curling: Adds volume and creates an illusion of thicker hair that holds shape better for days.
Pro tip: Alternating the direction of rotation every other strand mimics real hair growth patterns and significantly increases realism.
How to touch up and refresh waves
To refresh a wig's waves between washes, lightly mist with water or a leave-in conditioner for human hair, scrunch with a texturizer, and use low heat touch-ups only on sections that need redefinition. For synthetic wigs, use a specialized refresh spray and a low-heat flat iron if the fiber permits. Always cool the area after re-styling.
Environmental factors affecting hold
Humidity and temperature impact how well curls hold. On humid days, use anti-humidity hairspray and consider a slightly stronger hold product. In dry climates, add a moisturizing product to prevent static and frizz. When photographing the wig, use natural light and subtle backlighting to emphasize texture without washing out the curl definition.
Checklist for long-lasting natural waves
- Proper heat setting for fiber type.
- Consistent section sizes and tension.
- Alternating curl directions for realism.
- Cool sets for every curl.
- Appropriate finishing products in moderation.
Closing thoughts
Learning how to curl a wig with a flat iron is a repeatable skill that improves with practice, patience, and attention to detail. Prioritize fiber health, protect from excessive heat, and take time to cool and finish each section. Use the methods outlined—rotation, bend technique, and cooling—to build a repertoire of textures from elegant waves to beachy movement. With these pro tips, you’ll achieve consistently natural results that last.
FAQ
Q: Can I use any flat iron to curl a wig?
A: Not all flat irons are ideal. Choose a tool with adjustable temperature and smooth plates; narrow plates help with short wigs and detailed work. Always test the iron on a concealed strand and use the lowest effective heat.
Q: How do I make curls last longer on synthetic wigs?
A: For heat-friendly synthetics, use lower temperatures, cool sets, and light texturizers. Where possible, use heat-set techniques recommended by the manufacturer and minimize washing to preserve shape.
Q: Is it safe to sleep in a curled wig?
A: Sleeping in a styled wig can reduce longevity due to friction. Use a silk bonnet or place the wig on a stand and cover with a silk scarf to protect the waves overnight.
By applying these guidelines, experimenting with section sizes, rotation angles, and finish products, you’ll master practical steps to create long-lasting, natural waves using a flat iron. This SEO-aware resource highlights critical aspects of how to curl a wig with a flat iron, while offering realistic, professional strategies to extend the life and look of your wig styling efforts.
Related products
Blog
- do i need a wig cap - expert guide to why, when and how to wear one for better fit and comfort
- How to Get Rid of Wig Shine Fast with 9 Proven Tricks for a Natural Matte Finish
- How to Curl a Synthetic Wig - 9 Heat-Free and Low-Heat Methods with Step-by-Step Tips
- Ultimate Guide to High Definition Lace Wigs 2025 - Expert Tips for Natural Look, Care and Best Buys
- Quick guide on how to revive a wig and restore natural bounce in 7 easy steps
- wigs human hair buying guide 10 pro tips to choose, care and style for a natural look
- Where to get wig caps - 10 best online and local stores with sizing and styling tips
- 10 Simple Steps how to wear wig without wig cap and achieve a secure, natural look